Run PostgreSQL on Acurast
This example runs a real PostgreSQL server inside an Acurast Cargo deployment and exposes it two ways over the Acurast Tunnel:
- a browser SQL console on the primary connection (open it in any browser), and
- SSH on the secondary connection, so you can local-forward port
5432and use nativepsql.
Postgres itself only ever listens on loopback — it's never directly reachable; both paths reach it from inside the deployment.
The web console has no authentication and runs arbitrary SQL. It's for disposable/test databases only. SSH access is gated by SSH_PASSWORD.
1. Get the repo and open the example
git clone https://github.com/Acurast/acurast-example-apps.git
cd acurast-example-apps/apps/app-cargo-postgres
2. What's in the app/ folder
| File | Purpose |
|---|---|
start.sh | Entrypoint. Phase 1: installs SSH + tunnel deps, builds the getifaddrs shim, starts Dropbear and the tunnel. Phase 2: installs Postgres, initializes the data dir, creates the database, and starts the web console. Runs SSH first so a stalled install is still debuggable. |
tunnel.py | Opens the reverse tunnel — primary → web console (8080), secondary → SSH (2222). |
webadmin.py | The browser SQL console served over the primary connection. |
getifaddrs_override.c / sysv_shm_override.c | PRoot shims (Postgres needs the SysV shared-memory one). |
callback.sh | POSTs log / started / error events to your CALLBACK_URL. |
3. (Optional) Use your own domain
By default the tunnel serves on https://<clientId>.acu.run, with a Let's Encrypt
certificate provisioned automatically — nothing to set up. To use your own domain
suffix instead, do the one-time DNS setup (a wildcard record and an _acu TXT
record) from the
Tunnel Quick Start
(step 2) and set DOMAIN_SUFFIX_MAINNET/_CANARY below.
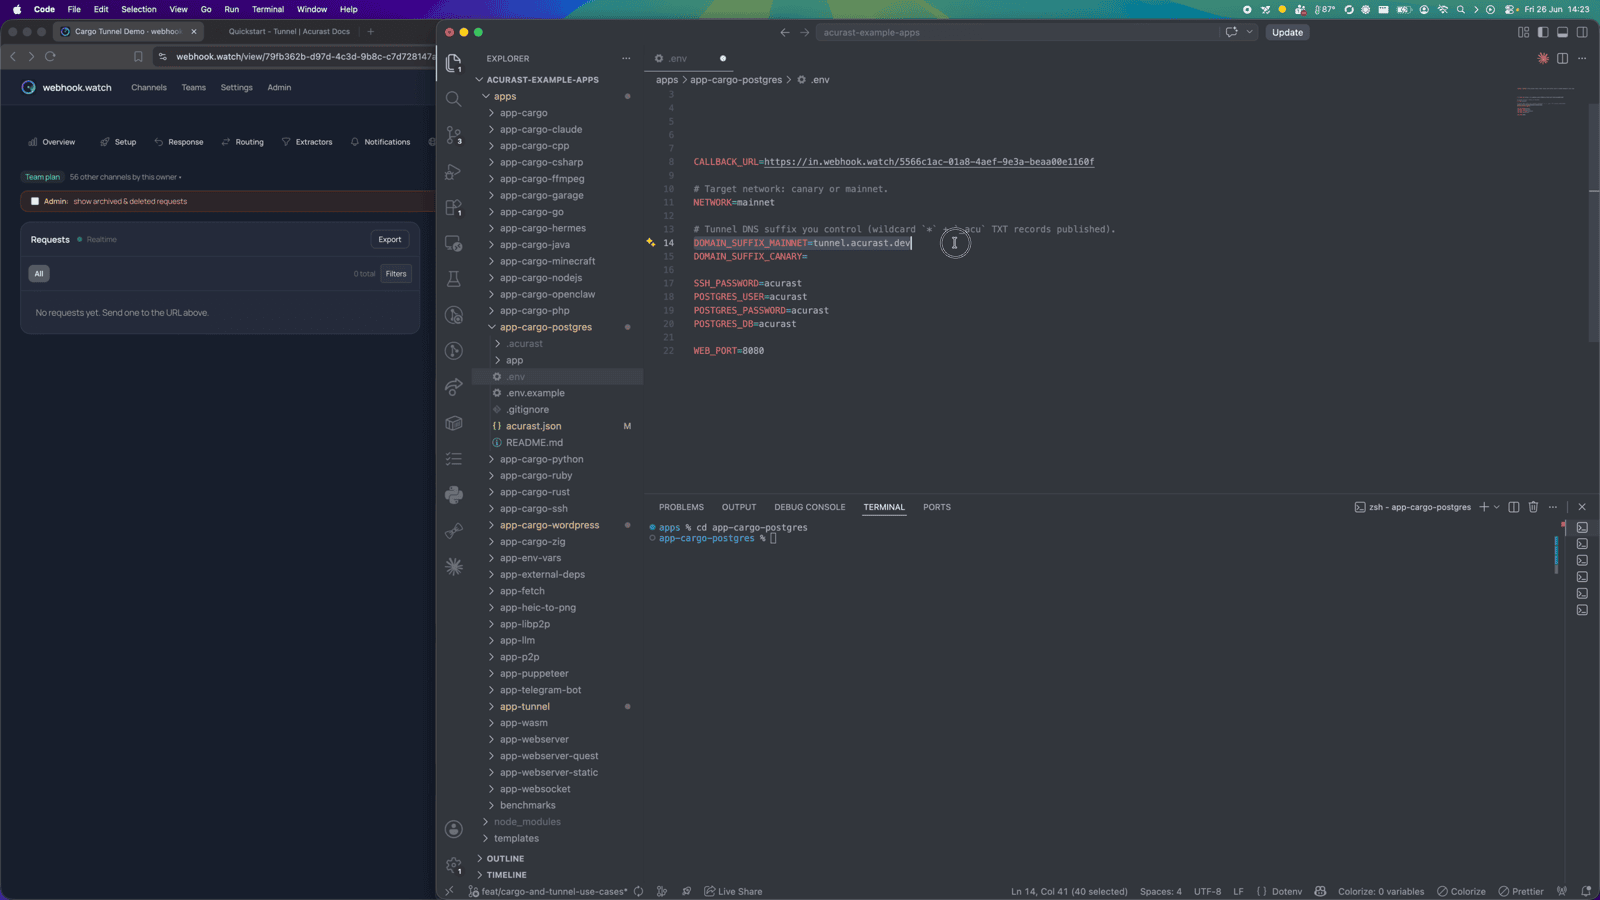
4. Configure .env
cp .env.example .env
| Variable | Required | What to set |
|---|---|---|
ACURAST_MNEMONIC | ✅ | Deployer seed phrase. Never commit it. |
NETWORK | ✅ | canary or mainnet. Must match acurast.json. |
DOMAIN_SUFFIX_MAINNET / _CANARY | optional | Only for a custom domain. Leave unset to serve on acu.run. If set, use the one matching NETWORK and add it to includeEnvironmentVariables. |
SSH_PASSWORD | optional | Root SSH password. Defaults to password — set a strong value. |
POSTGRES_USER / POSTGRES_PASSWORD / POSTGRES_DB | optional | Superuser, password and DB created on first start. Set strong values. |
CALLBACK_URL | optional | Lifecycle-event webhook. Use webhook.watch. |
Getting a CALLBACK_URL from webhook.watch
Open webhook.watch to get a unique inspector URL, and
paste it into CALLBACK_URL. The deployment POSTs its log / started events
there — including the web URL and the SSH connect command — so you never have to
dig through logs.
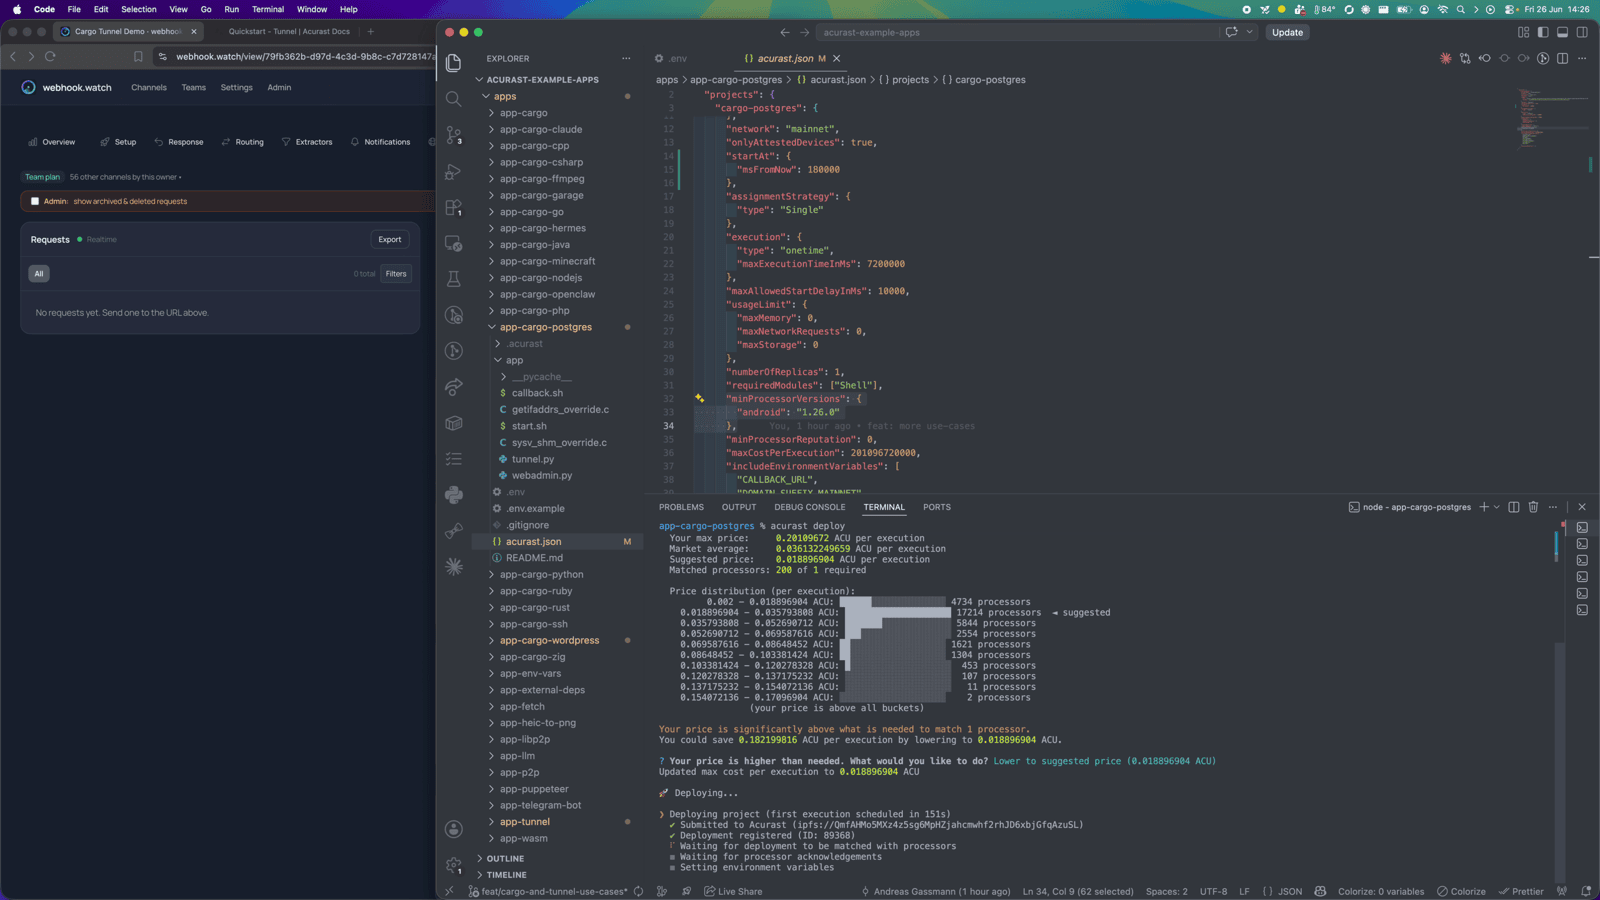
5. A glance at acurast.json
runtime: "Shell"on aproot-distroUbuntu image.execution:onetime,maxExecutionTimeInMs: 7200000(2-hour window).minProcessorVersions.android: "1.26.0"(tunnel support).includeEnvironmentVariables:CALLBACK_URL,NETWORK,SSH_PASSWORD,POSTGRES_USER/PASSWORD/DB,WEB_PORT.
6. Deploy
npm i
npm run deploy   # runs `acurast deploy`
The CLI shows the reward market and a suggested price — accept it and confirm.
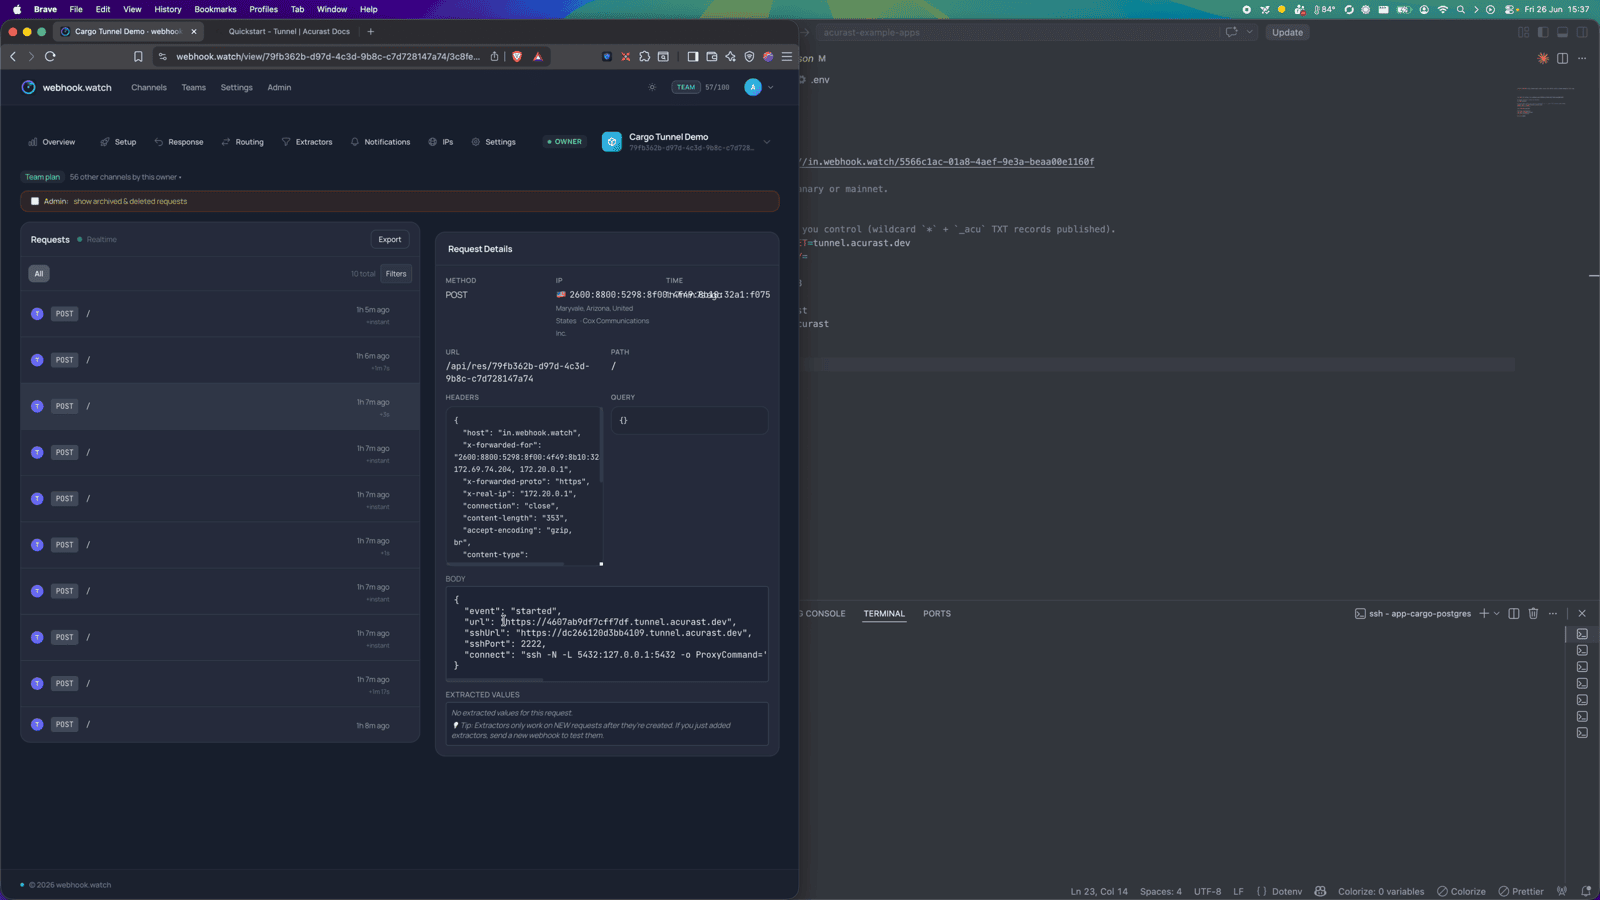
Then watch webhook.watch. After the install log events you'll get the started
event with the web URL, the SSH connect command, and the forward command for
native psql.
Part 2 — Using the database
Option A: SSH in and run native psql
The started event includes a forward command that local-forwards 5432 over
SSH. Run it, then in another terminal:
psql -h 127.0.0.1 -p 5432 -U <POSTGRES_USER> -d <POSTGRES_DB>
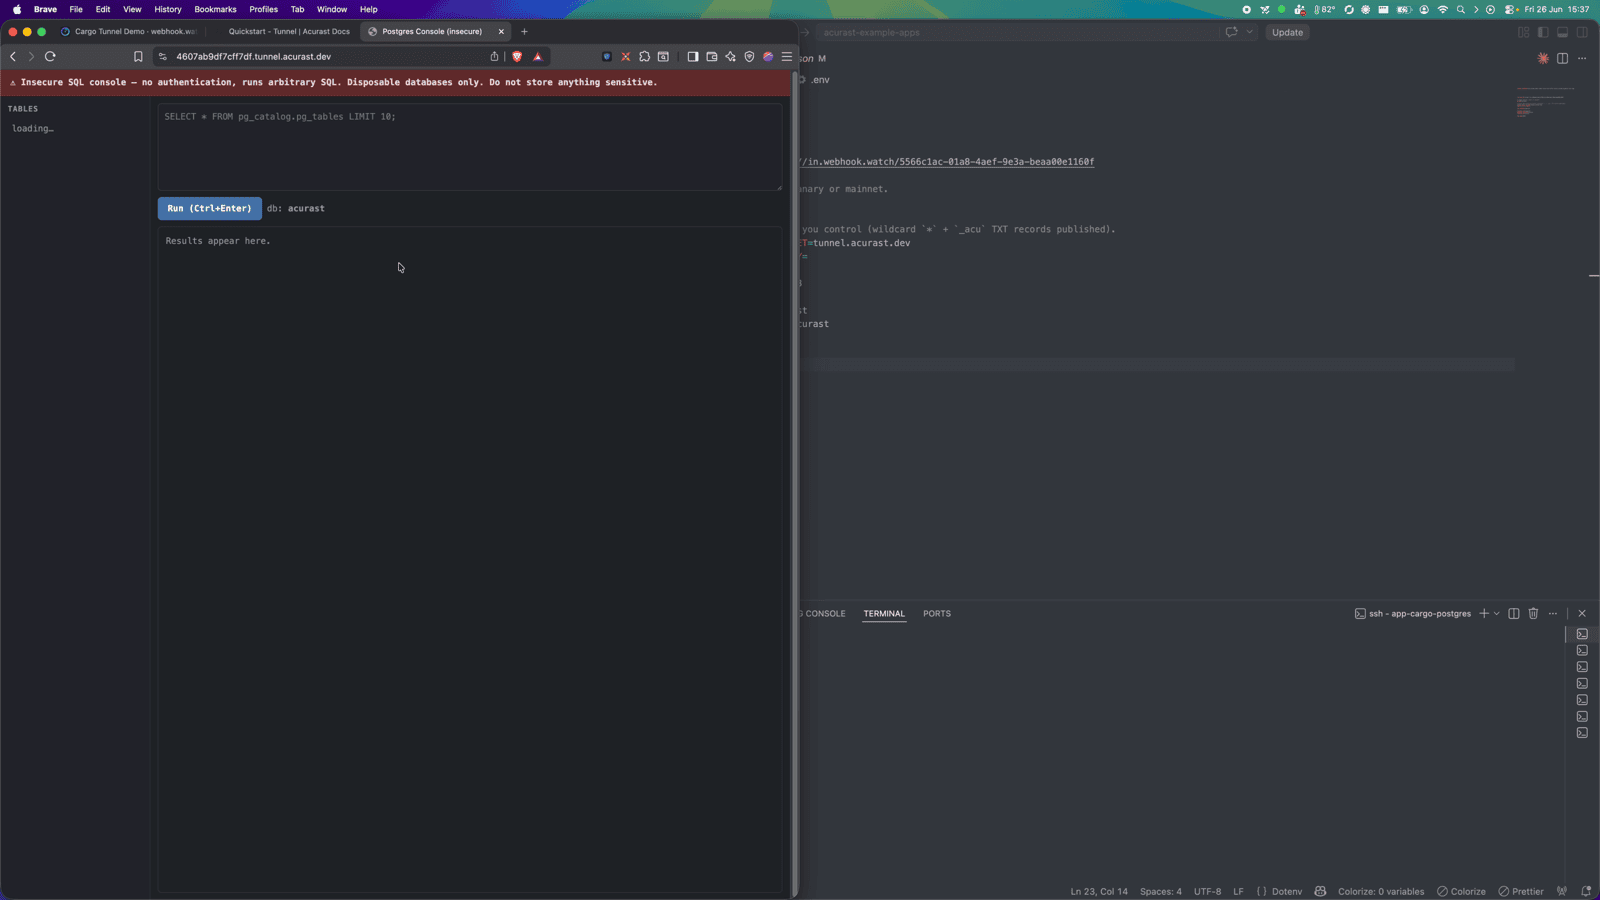
Option B: the browser SQL console
Open the url from the started event. You land on the SQL console — note the
red "Insecure SQL console" banner, a reminder that anyone with the URL has full
access.
From here it's just SQL. Create a table and insert some rows:
CREATE TABLE notes (id serial primary key, body text, created_at timestamptz default now());
INSERT INTO notes (body) VALUES ('hello acurast'), ('second row');

…and query them back:
SELECT * FROM notes ORDER BY id;
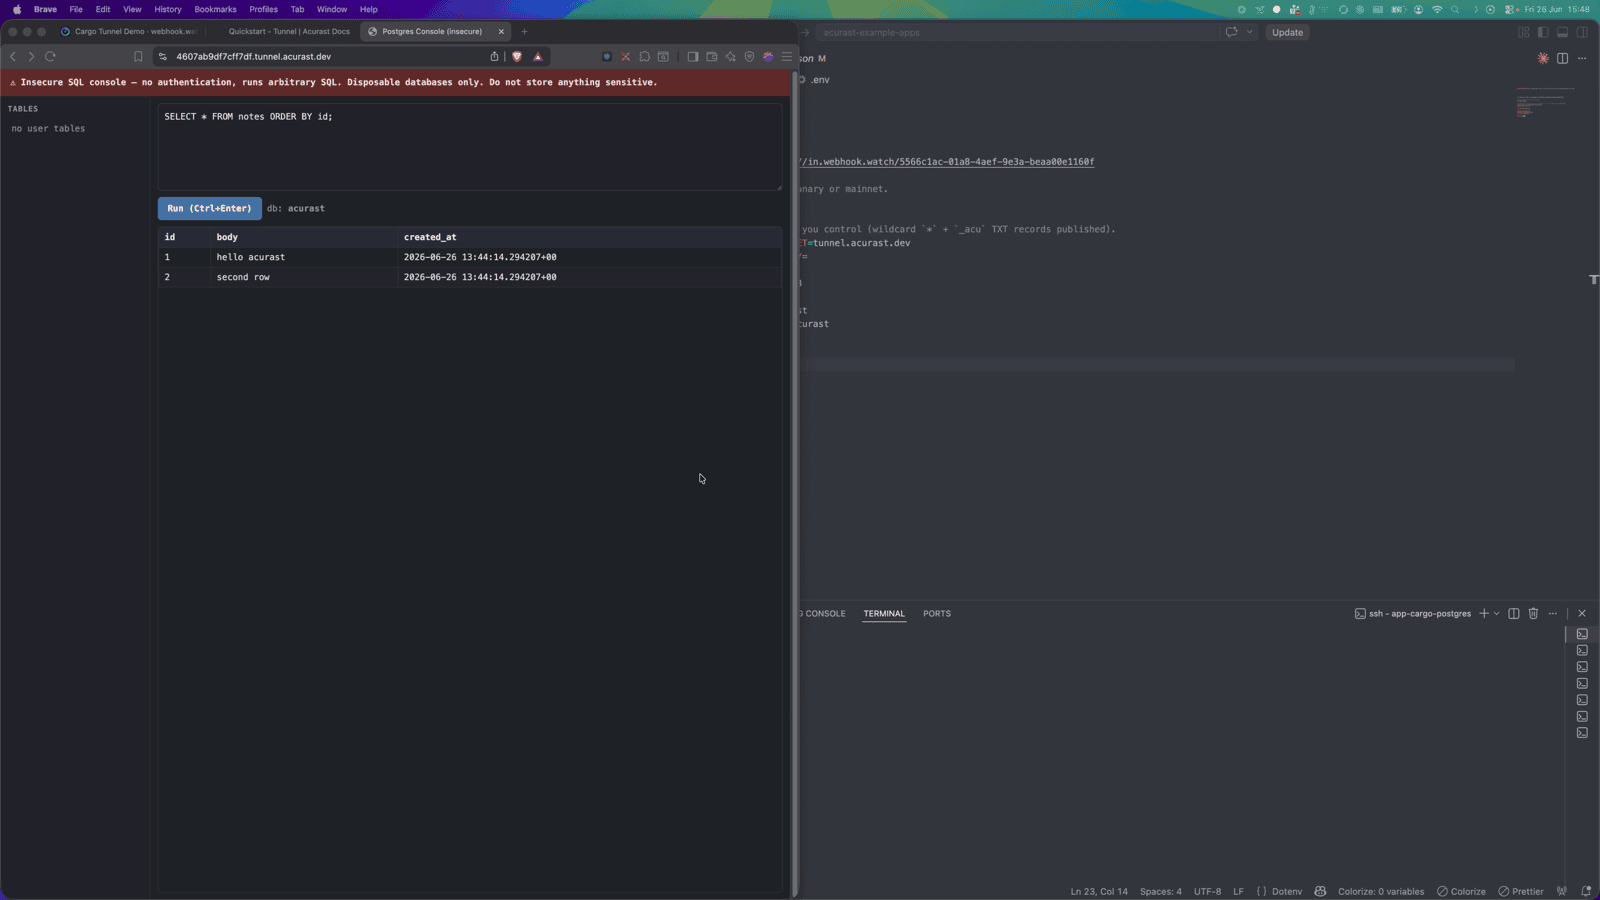
A full relational database, running on a phone, reachable from your browser over a trusted TLS URL. Remember: the storage is ephemeral — everything is lost when the deployment ends, so treat it as a disposable/test database.