Node Setup
The recommended way to run the Acurast node is by using the published Docker images for Mainnet and Canary.
Get the chain spec
Download the Acurast chain spec from the Acurast GitHub repository:
- Mainnet
- Canary
Configure the node
Create an acurast-node folder. Inside this folder, the following 2 folders and file:
chain-specs- place the downloaded chain spec heredata- this is where the node will store its datadocker-compose.yml- this is where the docker-compose configuration will be placed
In the docker-compose.yml file, put the following content:
- Mainnet
- Canary
services:
  node:
    image: "acurast/node-mainnet:acurast-v0.26.7"
    command: "--chain /node/chain-specs/acurast-mainnet-parachain-3396-raw.json \
      --base-path /node/data \
      --bootnodes /ip4/82.220.91.112/tcp/30335/ws/p2p/12D3KooWMJM3htCon6tQ6FzRuWkxtwEkd3i5awZitdTviWwJX3KY \
      --port 30334 \
      --rpc-port 9934 \
      --rpc-external \
      --rpc-methods safe \
      --name MyNode \ # choose an appropriate name here
      --telemetry-url \"wss://telemetry.polkadot.io/submit/ 0\" \
      --database=rocksdb \
      --pruning=archive"
    ports:
      - "30334:30334"
      - "127.0.0.1:9934:9934"
    volumes:
      - ./:/node
    logging:
      options:
        max-size: "10m"
        max-file: "3"
services:
  node:
    image: "acurast/node-canary:acurast-v0.26.7"
    command: "--chain /node/chain-specs/acurast-kusama-parachain-2239-raw.json \
      --base-path /node/data \
      --bootnodes /ip4/57.129.99.69/tcp/30334/ws/p2p/12D3KooWKrSDeVQ4tVQ1eGjqVAhAW3cgMQFHNCBbJrpmupEvdD4A \
      --port 30334 \
      --rpc-port 9934 \
      --rpc-external \
      --rpc-methods safe \
      --name MyNode \ # choose an appropriate name here
      --telemetry-url \"wss://telemetry.polkadot.io/submit/ 0\" \
      --database=rocksdb \
      --pruning=archive"
    ports:
      - "30334:30334"
      - "127.0.0.1:9934:9934"
    volumes:
      - ./:/node
    logging:
      options:
        max-size: "10m"
        max-file: "3"
The configuration above will start the Acurast node with the following options:
--chain- specifies the chain spec file--base-path- specifies the base path for the node data--bootnodes- specifies the bootnodes to connect to--port- specifies the p2p port for the node--rpc-port- specifies the RPC port for the node--rpc-external- allows access to the RPC interface from outside the container; the Docker port mapping above restricts host access to localhost--rpc-methods safe- allows only safe RPC methods--name- the name of the node--telemetry-url- The telemetry URL, the node will send telemetry data to telemetry.polkadot.io under the configuredname--database=rocksdb- specifies the database type--pruning=archive- specifies the pruning mode, changearchiveto the number of blocks to keep if you want to prune the database
:::info RPC access is local by default
The 127.0.0.1:9934:9934 port mapping exposes RPC only on the node host's loopback interface. Do not replace it with 9934:9934, which listens on all host interfaces. If remote RPC access is required, use an authenticated reverse proxy and firewall, and keep --rpc-methods safe enabled.
:::
Start the node
In acurast-node folder and run the following command:
docker compose up -d
This will start the Acurast node in detached mode. You can check the logs by running:
docker compose logs -f
Collator Onboarding
The steps below describe how to onboard a collator on Acurast Canary or Acurast Mainnet.
Pre registration checks
- Make sure the node is fully synced.
- Make sure the node is running on hardware that meets the minimum requirements. It is possible to check by looking at the node logs when it first starts:
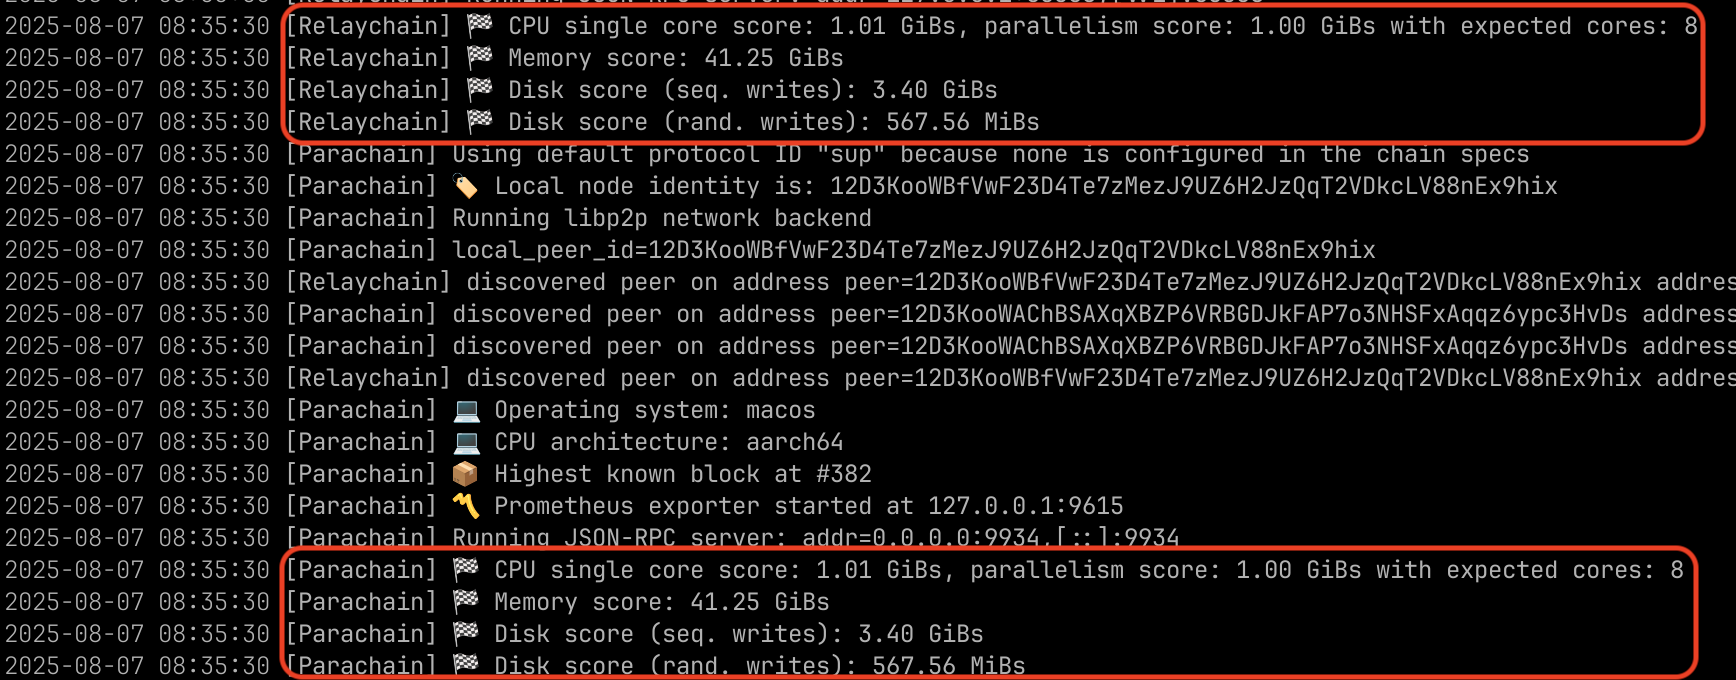
If the hardware is good enough, there should not be any warning log message after the benchmarks logs shown in the screenshot above.
Generate the collator account
A collator account is needed. One way to create it is to use a tool like subkey.
subkey generate
The output of the above command is something like:
Secret phrase:       <MNEMONIC>
  Network ID:        substrate
  Secret seed:       0x4f....
  Public key (hex):  0x86....
  Account ID:        0x86....
  Public key (SS58): 5F7Cm8Kt57dX3SkdtYYDGdMn3yiPvC8dr3oSratmGjjLmSss
  SS58 Address:      5F7Cm8Kt57dX3SkdtYYDGdMn3yiPvC8dr3oSratmGjjLmSss
This account is the collator account. It signs the session.setKeys and collatorSelection.registerAsCandidate extrinsics, so it needs to be funded and its secret kept safe.
Any wallet can be used instead of subkey, for example an account from the PolkadotJS browser extension. What is needed in the next steps is the public key of the account in hex format, the "Public key (hex)" line above, which is 32 bytes and 0x-prefixed. For an existing account it can be obtained with subkey inspect <SS58 address>. Note that the SS58 address is not what the RPC expects.
Generate the session key
Generating the session key requires temporarily enabling unsafe RPC methods.
:::warning Keep unsafe RPC private
Never enable --rpc-methods unsafe while RPC is reachable from the internet. Keep the 127.0.0.1:9934:9934 mapping, do not forward port 9934 through a reverse proxy, and use a firewall to block inbound access as defense in depth. CORS is not an access control mechanism.
For remote administration, connect to the node host over SSH and run the RPC call there, or create an SSH tunnel with ssh -L 9934:127.0.0.1:9934 user@node-host and call http://localhost:9934 from the administration machine.
:::
With these protections in place, temporarily change --rpc-methods safe to --rpc-methods unsafe in docker-compose.yml and recreate the container:
docker compose up -d
The author_rotateKeysWithOwner RPC call generates a new session key together with the proof of possession required by session.setKeys. It takes one parameter: the public key (hex, 32 bytes, 0x-prefixed) of the collator account that will submit the session.setKeys extrinsic. It is the raw public key, not the SS58 address.
curl -H "Content-Type: application/json" \
--data '{
  "jsonrpc":"2.0",
  "method":"author_rotateKeysWithOwner",
  "params":[
    "INSERT_COLLATOR_ACCOUNT_PUBLIC_KEY_HEX"
  ],
  "id":1
}' \
http://localhost:9934
author_rotateKeysWithOwner must be used instead of author_rotateKeys since Acurast node v0.26.4 (Mainnet spec version 15), because session.setKeys now verifies the proof of possession returned by this call.
The output of the above command should be something like:
{
  "jsonrpc": "2.0",
  "id": 1,
  "result": {
    "keys": "0xcc038816bd81c238bd1d163c48cea9c5e3b62899b8f193863f68268a719cca44",
    "proof": "0x8a3f1c92e47b05d6aa19f3c84e7d2b60915ac73e4f81d2ca6b0e59d73f4a1c8825d90b7e36af14c05e82d9b7130fa64c9e5b28d14f7a36c0b9e142d85fa63c07"
  }
}
Immediately after the call succeeds, edit docker-compose.yml again: change --rpc-methods unsafe back to --rpc-methods safe and add the --collator flag to the command, then recreate the container with docker compose up -d. Confirm that the RPC endpoint is not publicly accessible before continuing.
For more information about securing RPC access, see the RPC Deployment page of the Parachain Devops guide.
Set session key
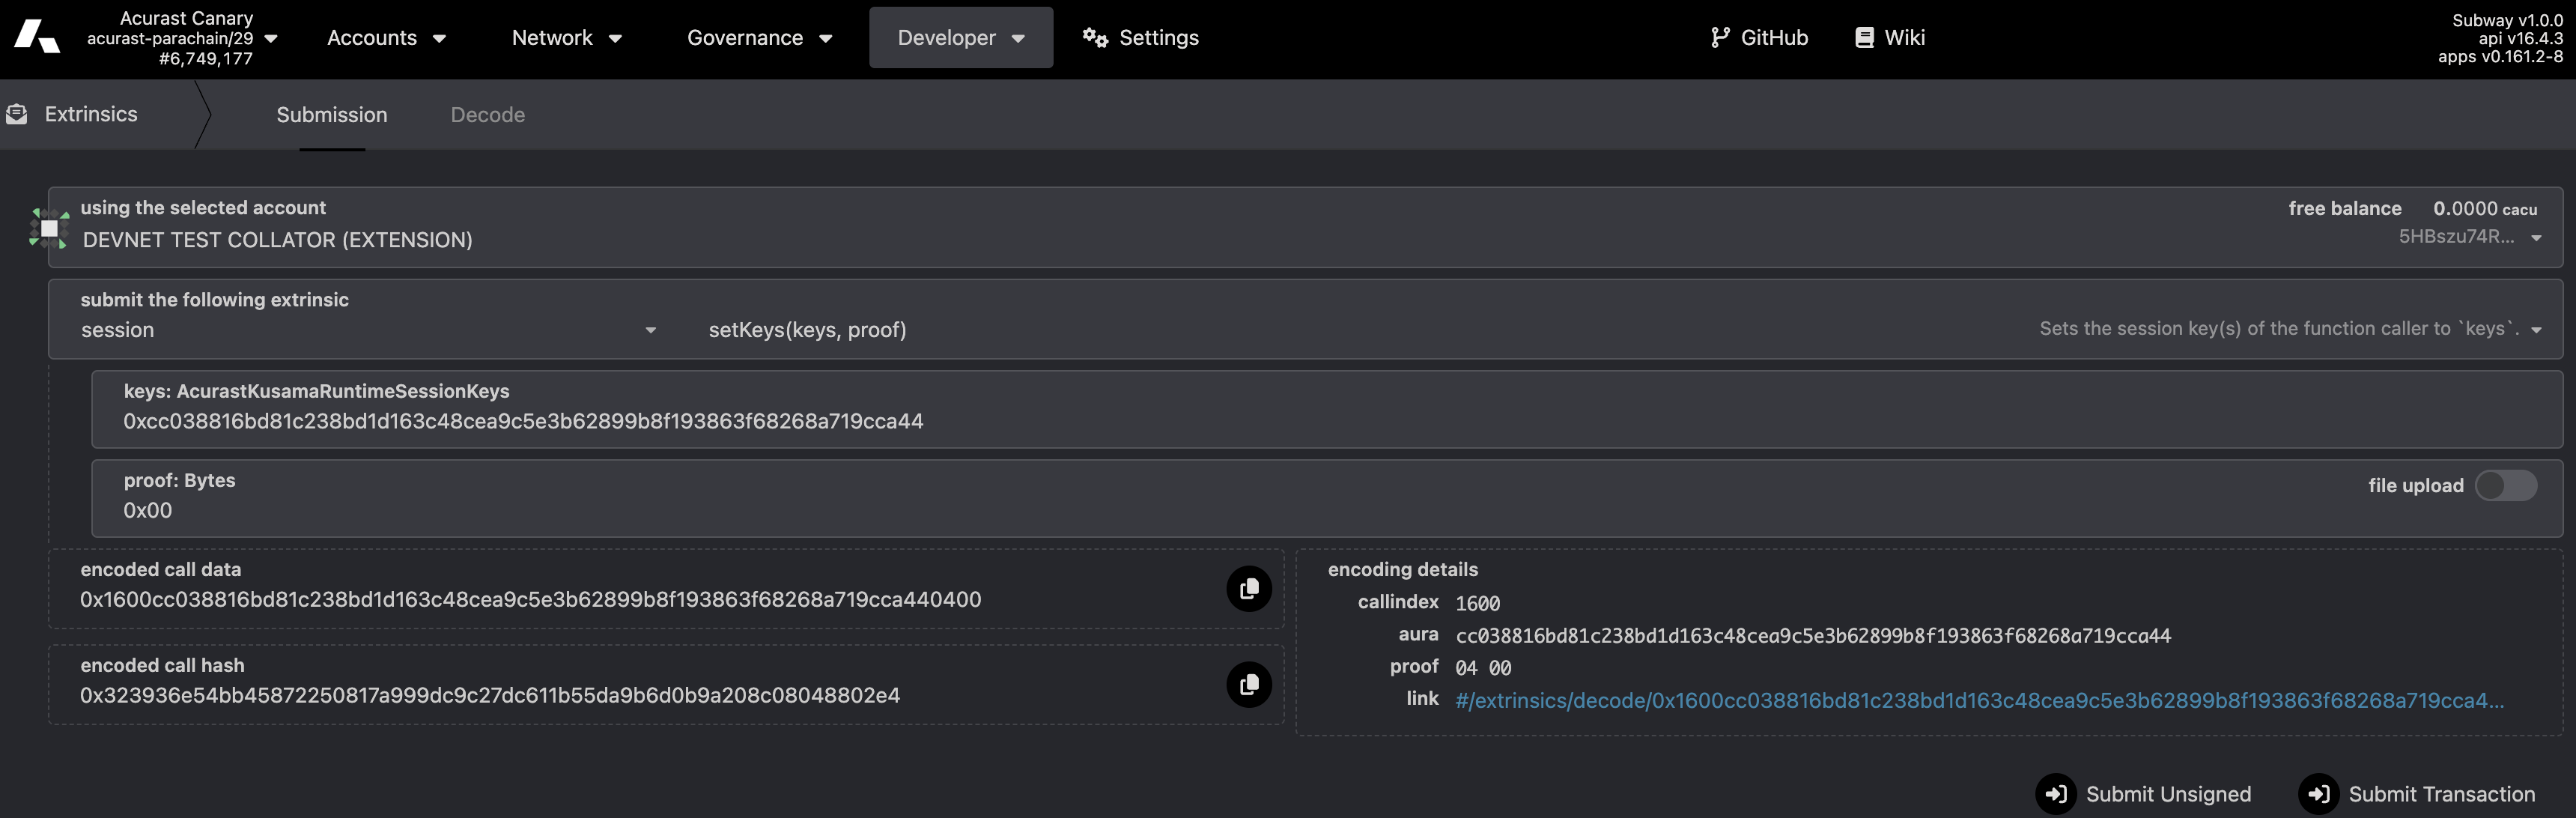
Next, submit the extrinsic session.setKeys with the collator account to the Acurast Canary or Acurast Mainnet chain. The first argument is the keys value of the RPC response, the second argument (the proof) is the proof value.
Submitting with a wrong or empty proof, for example 0x00, fails with session.InvalidProof. The proof is bound to the account passed to the RPC, so setKeys must be signed by that same account.
Any tool can be used to submit the extrinsic call, the important thing is that it is submitted by the collator account whose public key was passed to the RPC.
One option is to use the polkadotjs UI web app:
- Mainnet
- Canary
Then follow the steps below to set the session key:
- Go to the Extrinsics page:
Developer>Extrinsics - In
using the selected account, select the collator account - In
submit the following extrinsic, select thesessionpallet and thesetKeysextrinsic - Provide the arguments:
keysfromresult.keysandprooffromresult.proofof the previous RPC call - Click
Submit Transaction, then confirm and sign the transaction in the pop-up window
The screenshot below shows the filled in form:
Register as candidate
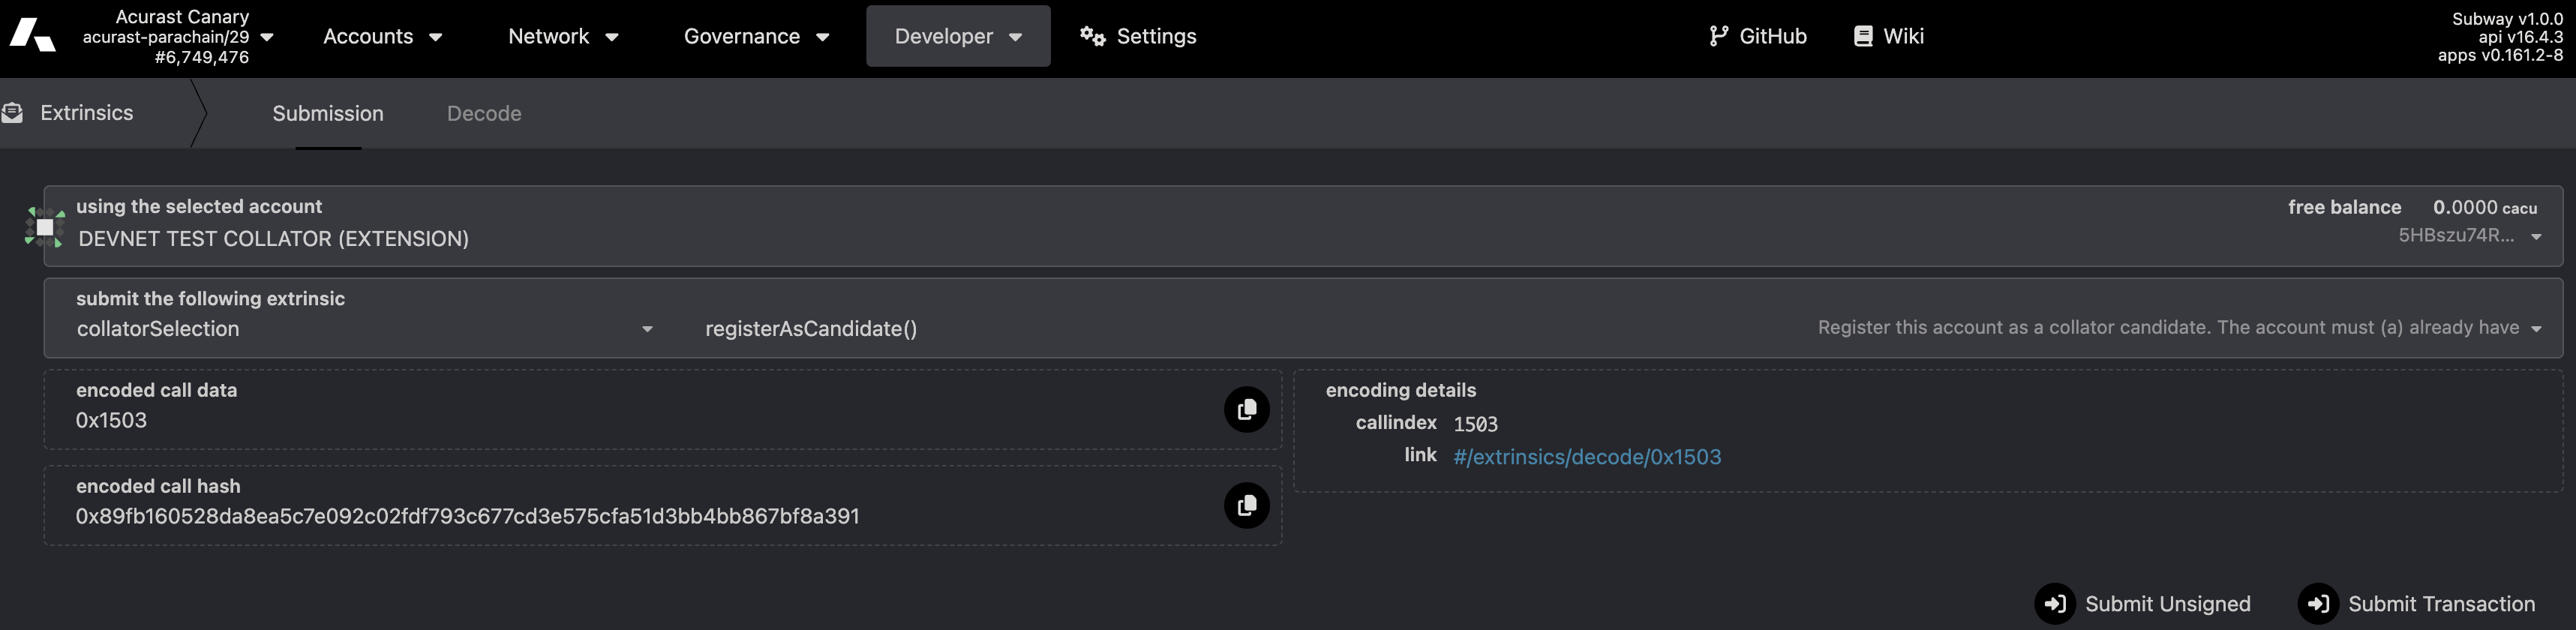
The collator account must first be added to the candidate preselection list by the Acurast team, otherwise the extrinsic below fails with collatorSelection.ValidatorNotRegistered. Please get in touch with the Acurast team before this step.
Once the session key is registered, the collator can be registered as a candidate, this is done through the extrinsic collatorSelection.registerAsCandidate, as before, the important thing is that the extrinsic is submitted by the collator account:
If the extrinsic is submitted successfully, the collator node is now fully onboarded and should start authoring blocks within 6-12 hours.